
Get your blog posts seen on Pinterest with this graphic design trick.

If you’re running an online business and not using Pinterest to its full potential to drive traffic to your website, you’re missing out big time. Pinterest boasts over 250 million monthly users, with its user base continuing to grow. And on top of that, they drive 33% more referral traffic than Facebook and a whopping 200% more than Twitter.
Personally, over half of all my site traffic comes directly from Pinterest, and many of my paying design clients find my work and blog posts there for the first time.
While Instagram, Facebook, and Twitter are all social media platforms where we focus on building relationships, followings, and connections, Pinterest is a search engine. This means that like Google, people often turn to Pinterest when they have a question or a problem.
Chances are, you already have some kind of content strategy in place to help grow your online business.
Whether it’s a blog, an email newsletter, a podcast, or a video series on YouTube, you’re likely already putting the time in to create helpful content to expand your audience and provide them with value.
You might even have already realized or learned that it’s a good idea to push each piece of content through to Pinterest, so those people searching for answers can find your solution.
But what if you’re not able to keep up with a weekly content production schedule? What if you’re just getting started and don’t have hundreds of pieces of content to share? It’s important to make sure that every single piece of content you do have, whether you’ve got one or one hundred, is working as hard for you as it possibly can.
How can we make that blog post (or podcast, or video series) content work harder and get seen on Pinterest?
By designing multiple graphics.
Most people will design just one graphic or image per piece of content. It usually serves as the main cover image or thumbnail, especially for blog posts. And with that one image, you’ve got one chance for that content on Pinterest.
But if you’ve got three or five graphics per piece of content, that’s a whole lot more opportunities to get seen on Pinterest. That number grows exponentially as you start adding more content.
So what else can you add to your blog post to get it seen on Pinterest?
The first thing you should know about Pinterest is that you're not limited to one graphic with a title and a picture! The more variety, the better.
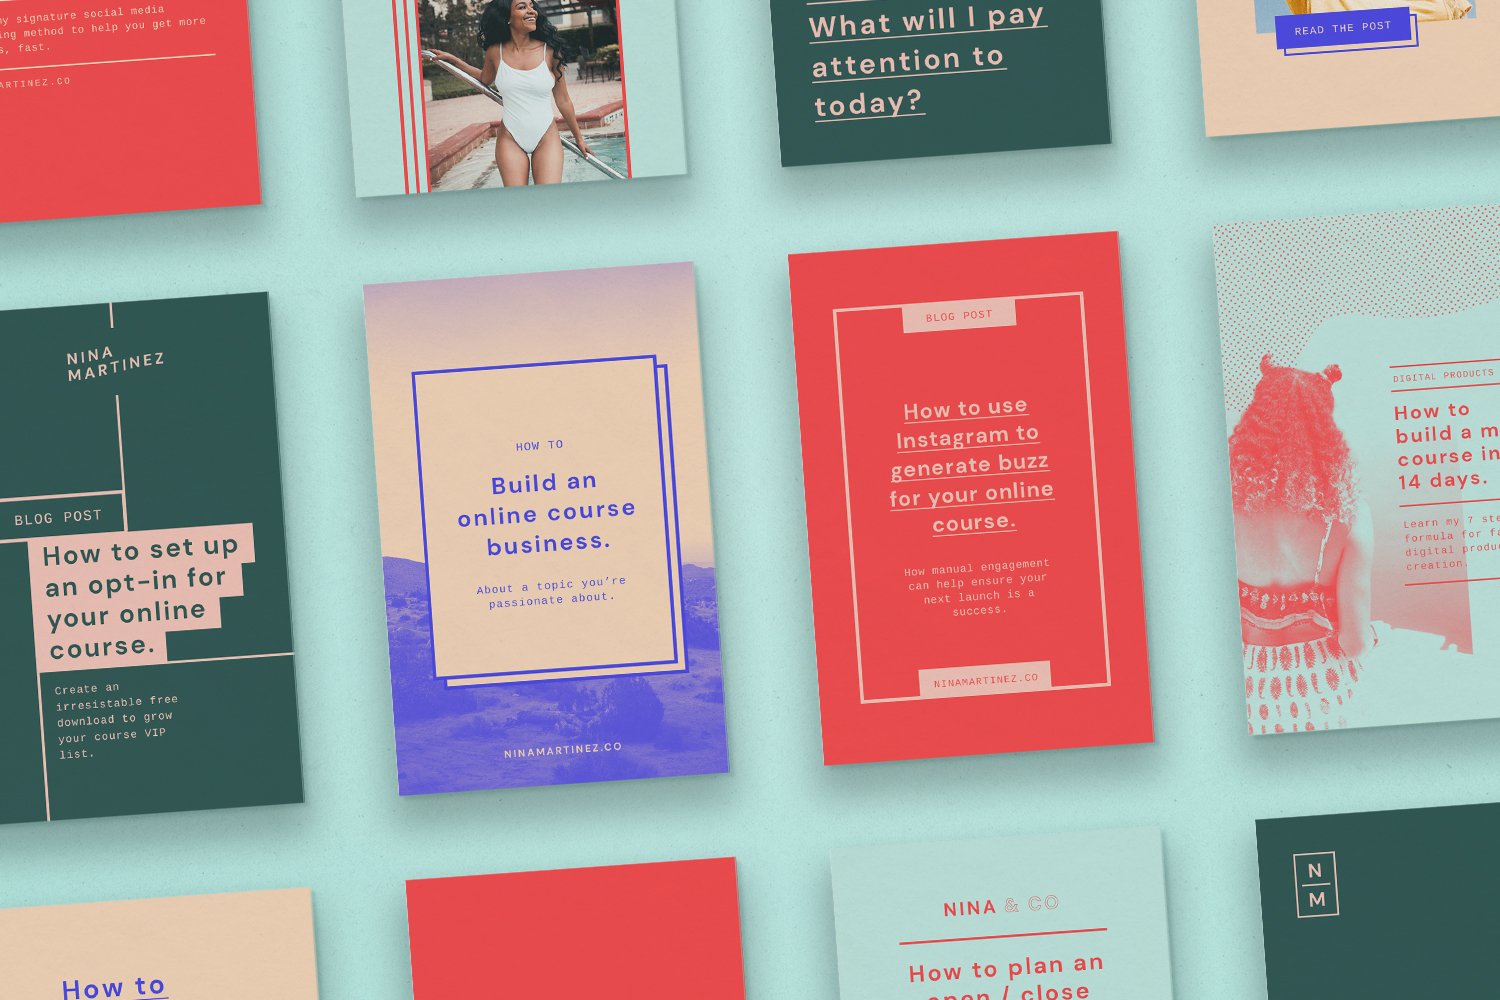
When I design graphics for blog posts or podcasts, I’ll create a suite of Pinterest optimized images. Some will have a title only, some will have room for a subtitle, and others might include an image. I’ll also create a handful of graphics for things like pull quotes, content upgrades and opt-ins, webinars and workshops, or even any products or services you might have that are related to that piece of content.
For example, here are some sets of Pinterest Graphics I’ve worked on:
AND MORE FROM A DIFFERENT SET…
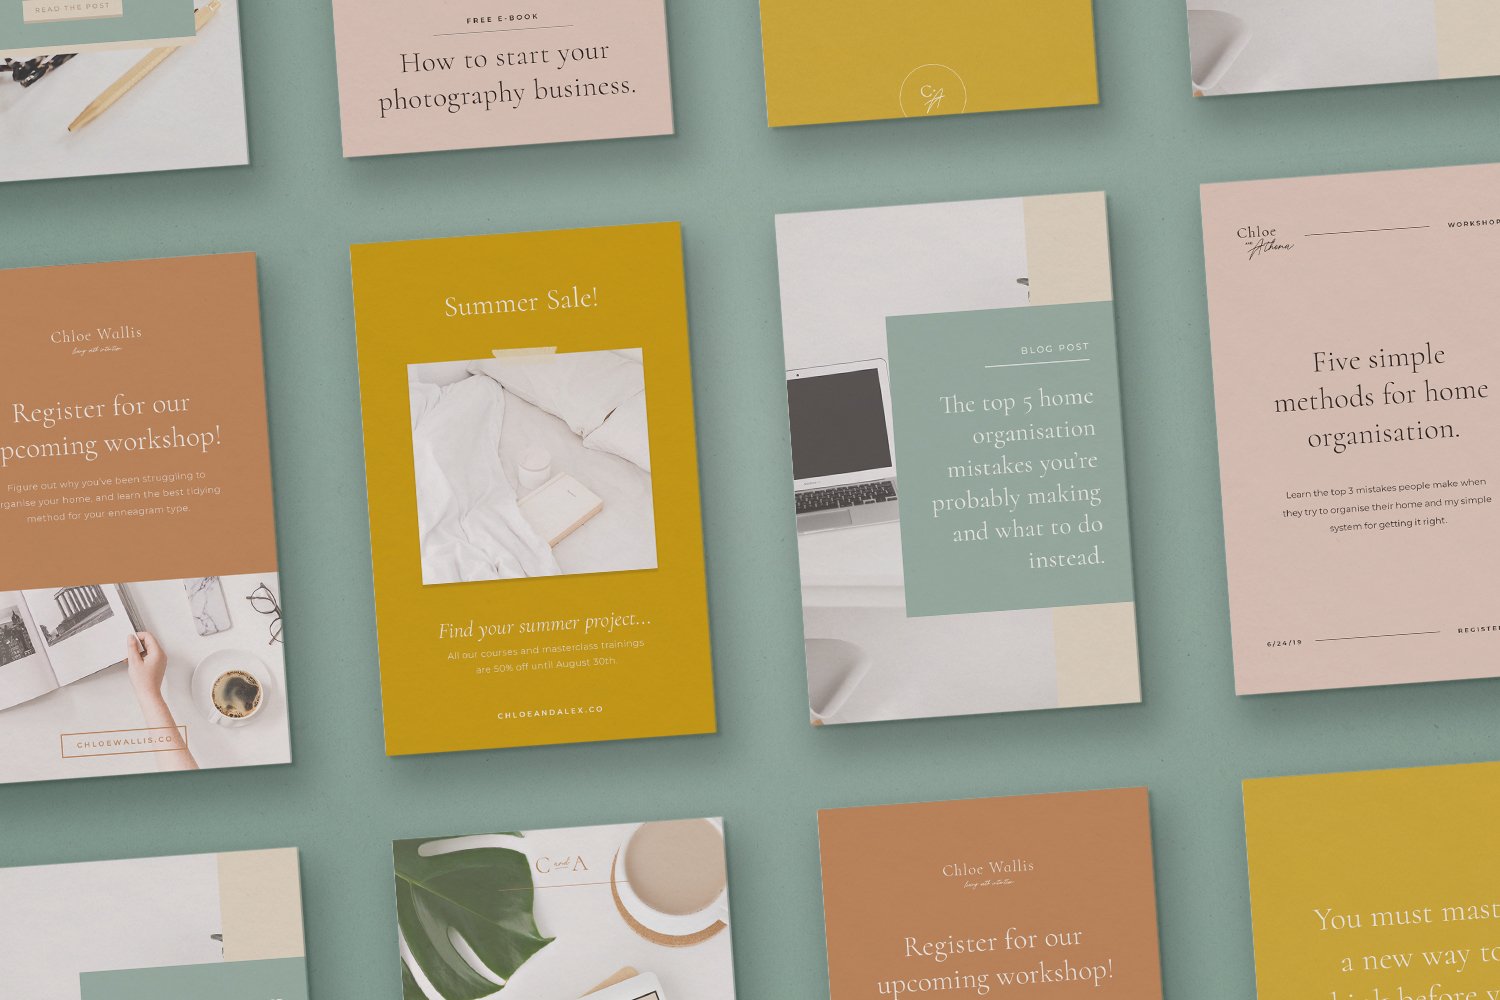
You’ll notice that they all work together and fit within the same theme and brand, but offer up a ton of flexibility and variety in terms of content, layout, and color.
When you start adding in all of those different kinds of graphics, you could easily have 5-10 graphics for each blog post!
On top of upping the chances that you get your pins seen by more people, the variety of graphics allows you to attract different kinds of people to the same piece of content. Different colors, layouts, and imagery will appeal to a wider number of people, meaning you’re less likely to lose out because someone didn’t like the color or style of the only graphic you chose to include.
But how do you add more images for Pinterest to your blog post without people seeing a ton of random images dumped throughout?
It’s important not to distract your reader / viewer / listener from the content they’ve come looking for. So it’s not a great idea to go dumping all of your Pinterest images in a big group into your content.
The first way to sneak them in, especially if you’ve got a longer-form piece of content like a blog post, is to assess whether there are any natural points in the piece where an image might make sense.
For example, I include my pull-quote graphics within the text near to where the original quote was included. And if you’ve got things like opt-in or content upgrade buttons or forms, above, below, or next to those elements are a great place to include graphics with mockups of your opt-in.
For ‘title’ graphics, I like to include one at the beginning of a post, and a different one at the end. This allows you to include two graphic variations in the same post naturally. It’s also handy for people who’ve read through to the bottom and decide they want to share without having to scroll back up.
But for the graphics that you don’t necessarily want people to see within the content itself, we’re going to take advantage of secret images for Pinterest sharing.
Secret blog post images for Pinterest sharing.
A secret image is a graphic that doesn’t show up on your blog post page or anywhere throughout your content but shows up as a sharing option when people hit the Pinterest share button. It can work with your built-in share buttons and also with the Pinterest browser extension.
So how do we use them? Today I'll be showing you in Squarespace, where we’ll create our secret images using a little bit of code.
Need to know for Wordpress? Here’s a handy video tutorial from Angie Gensler.
How to add secret images for Pinterest into your blog post on Squarespace.
First up, you'll want to create your post and all of your blog post graphics as normal.
Once your content is in place, be sure to add any normal, visible images in via Squarespace image blocks following the natural placement method we mentioned earlier.
When you're ready to start adding secret images, here are the instructions:
STEP ONE:
At the very end of your blog post, add a new code block. Inside the code block, paste in this piece of code:
<div style="display:none"><img src="IMAGE ADDRESS GOES HERE" border=0 alt="YOUR IMAGE DESCRIPTION HERE"/></a></div>
Hit save on the code block, and the blog post. You can close out of them for now.
STEP TWO:
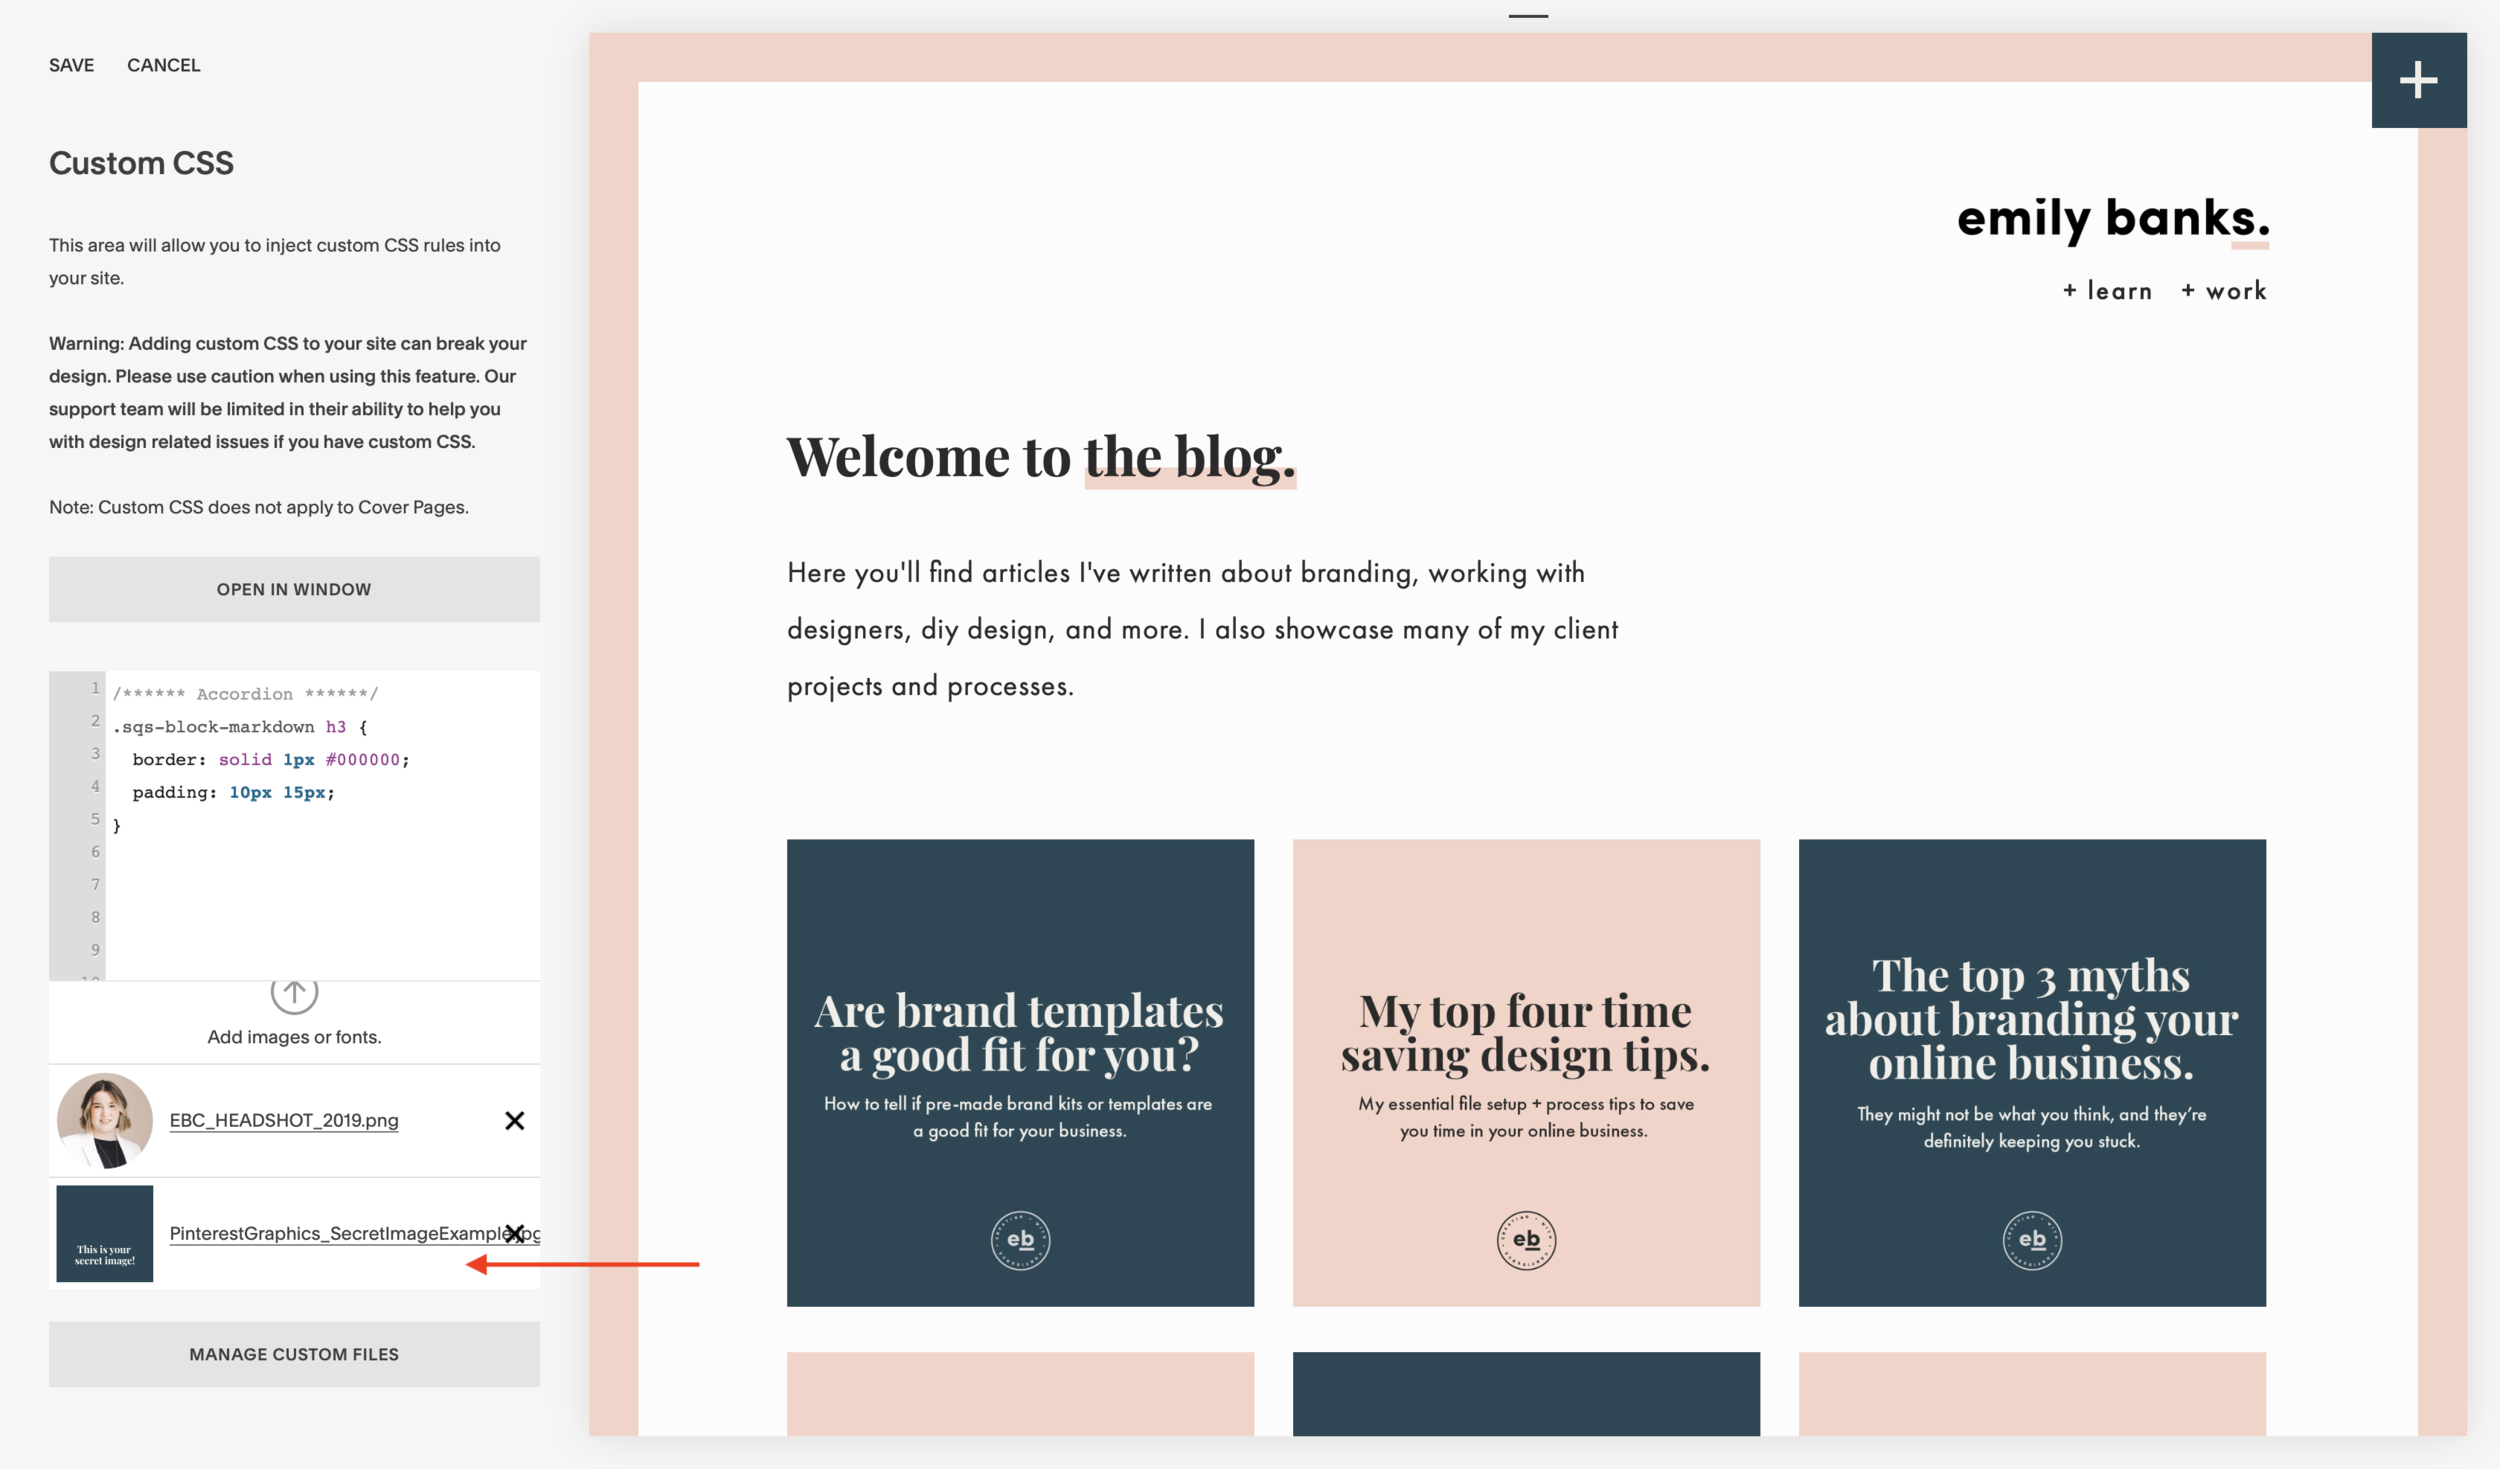
Now we need to upload our image. Because we’re coding it in, we can’t use a regular image block. Instead, we’ll upload it to Squarespace’s servers and use a little bit of code to add it into the post. From the main Squarespace menu, head to Website, and then scroll all the way to the bottom where you’ll find Website Tools, and from there, Custom CSS.
Tip: It’s much easier to leave your blog post and open up another tab of your Squarespace account to upload the images so you can easily jump back to the post when you’re ready!
STEP THREE:
With the Custom CSS window open on your site, hit ‘Manage Custom Files’. You’ll then see an option to upload an image. Select your image and upload it. When it's done, you'll see it appear in the list of managed files.


STEP FOUR:
Once uploaded, when you click on your image from the file manager, the image URL will appear in your CSS code box. Grab that code by copying it, and then go ahead and delete it from your CSS window.
* Note: your image URL will appear wherever your cursor is placed in the CSS box. So if you've got a lot of site code, be sure to make some space at the top and place your cursor there first.

STEP FIVE:
Head back to your blog post and open up the code block from earlier. Paste in the image URL we just collected anywhere you see the text, "IMAGE URL HERE". Be sure to leave the " " (quotes) in around your text or the code will fail.
STEP SIX:
Now your image URL is in, so go ahead and give it a quick description in the "IMAGE DESCRIPTION HERE" section. This text will show in your Pinterest description just in case your Rich Pin connection fails, so it's good practice to include a short description of the image or your post.

STEP SEVEN:
Your code is now complete, so save your code block, publish your post, and check to see if it’s working with the share buttons or your browser extension.
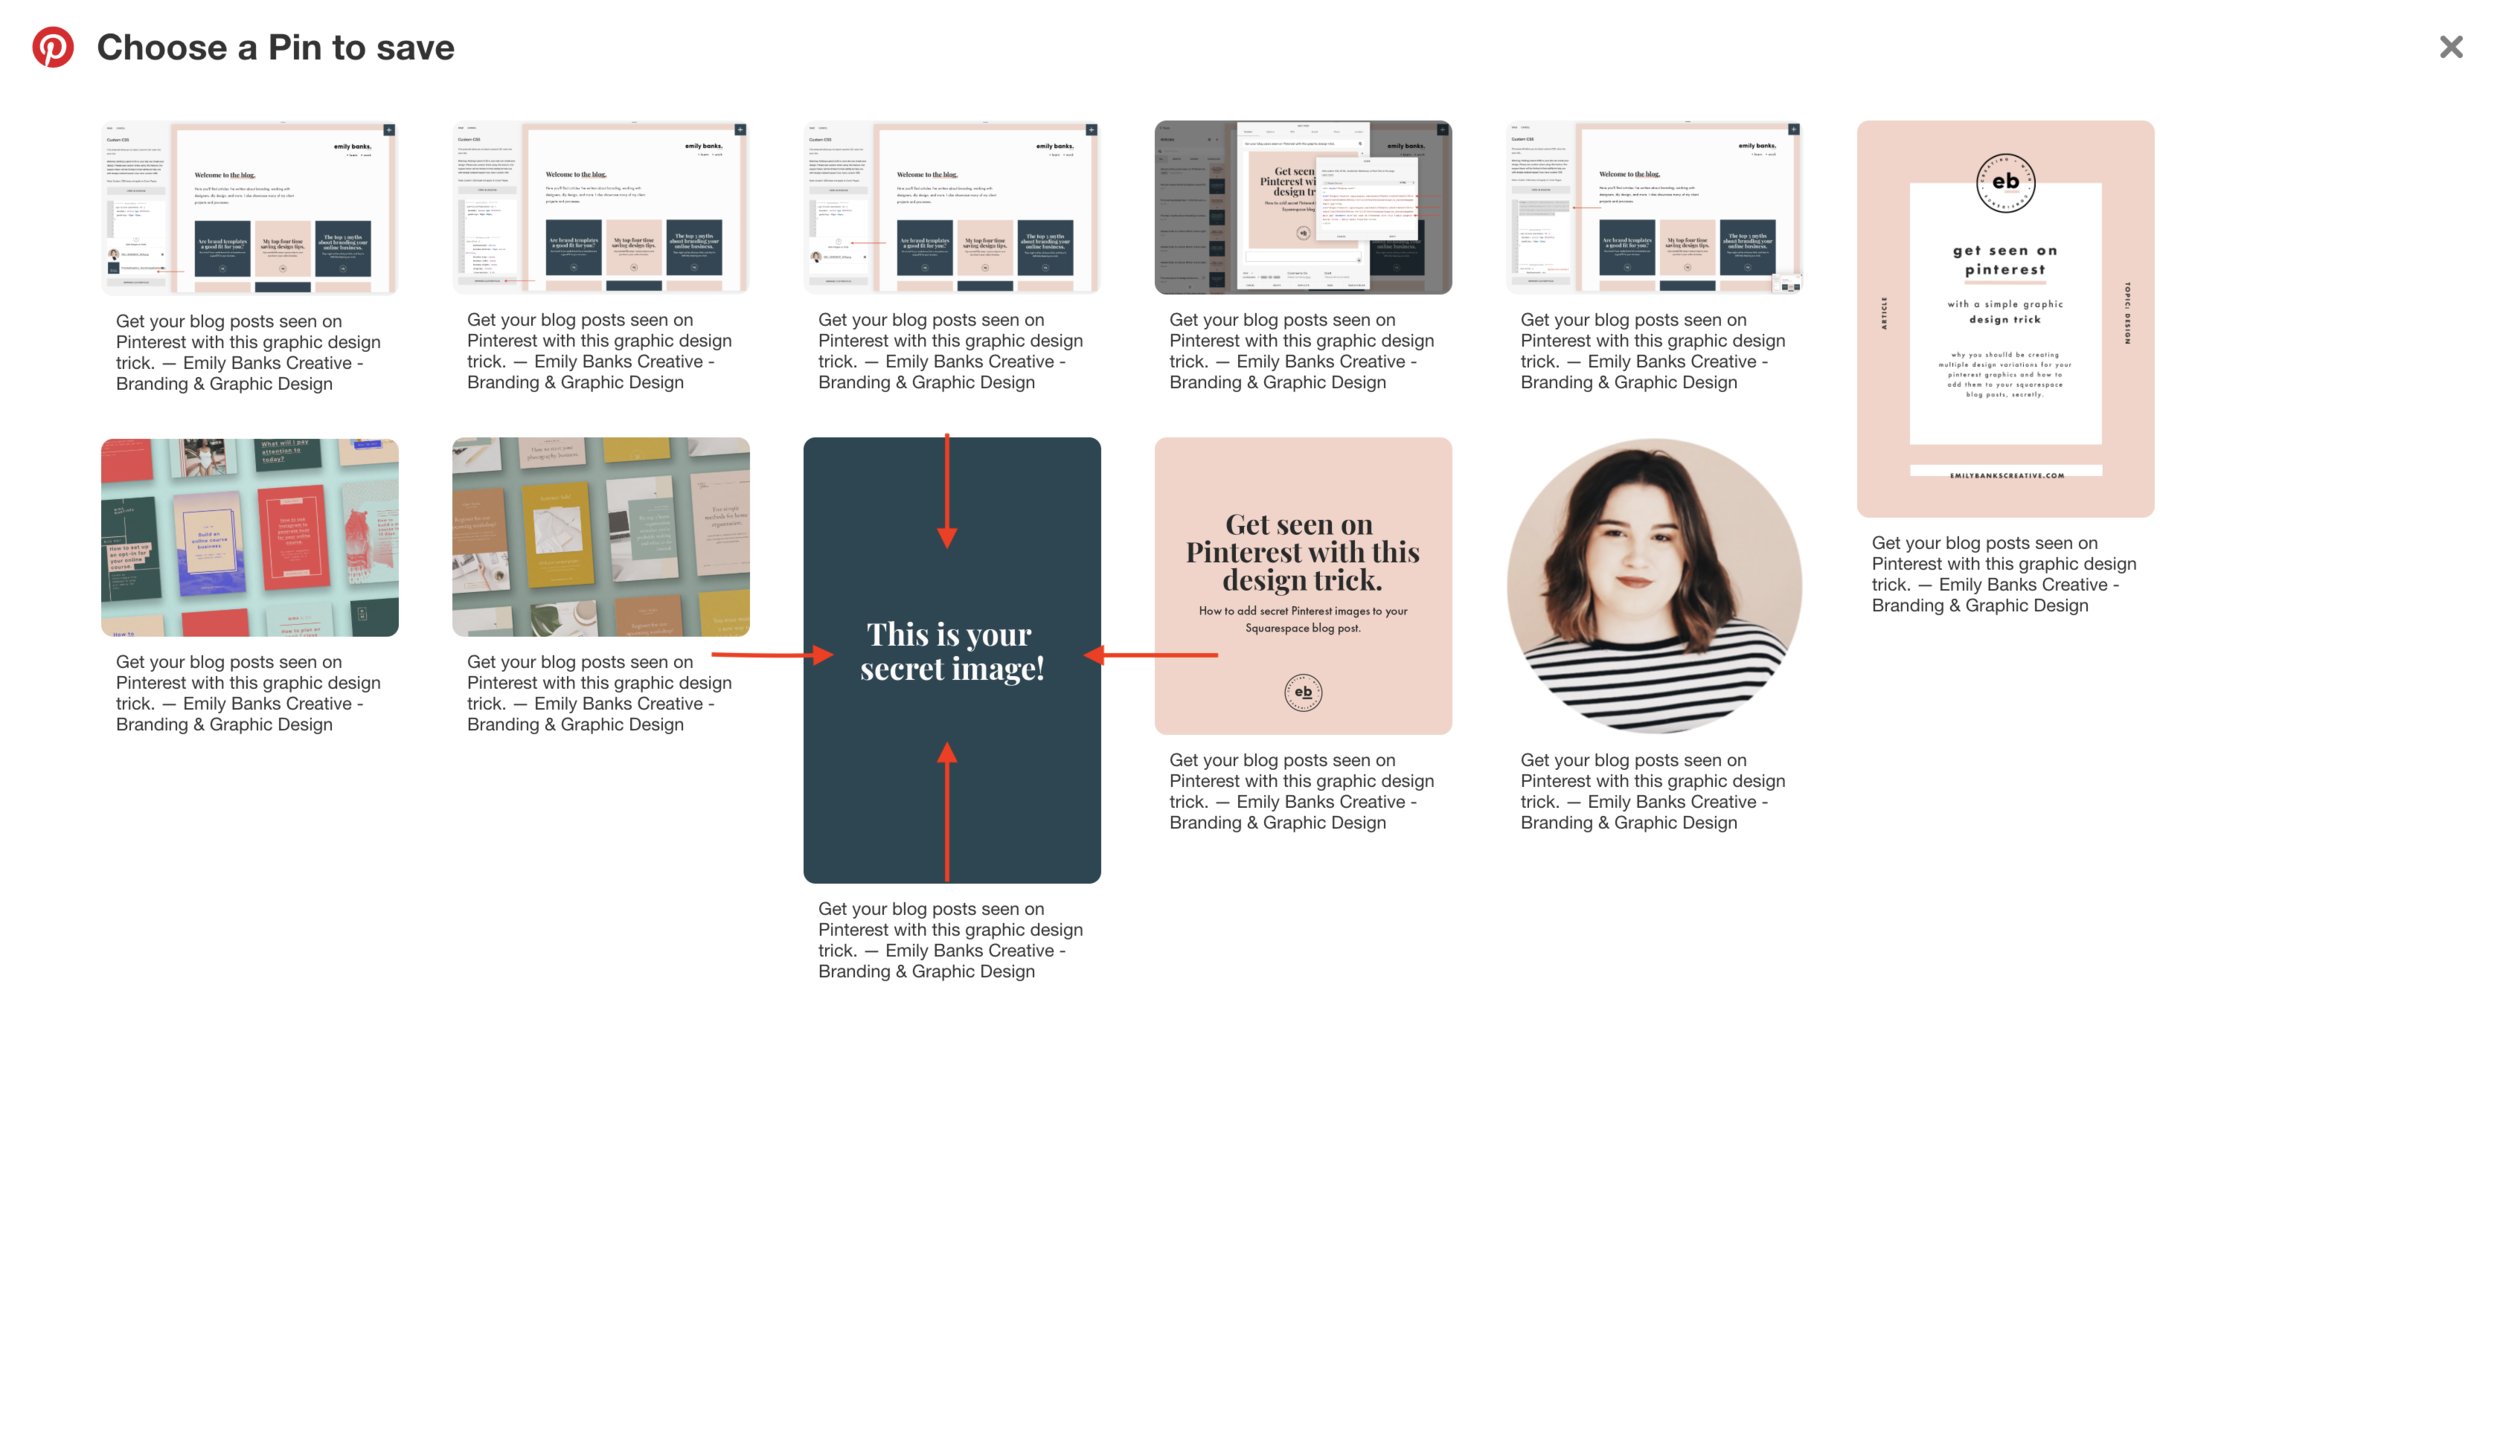
If it's worked correctly, you should see your secret image in the list of pinnable images upon sharing.
You can copy and paste the code for as many images as you’d like to upload. Simply upload those additional images into your file manager and grab their unique URLs to add to the additional codes!
Pinterest is such a powerful marketing tool for your online business.
If you put in the work with your content, additional graphics can make that content work much harder for you on Pinterest and help your business get seen by your audience.
I hope these tips help you improve your own Pinterest game! And if you’ve got any questions about Pinterest templates or branding in general, feel free to leave them in the comments below and I’ll do my best to answer you!
See you in the next one!
Emily Banks

